SUI Move开发必知必会——如何构建一个基于zkLogin的SUI Move dApp?
- rzexin
- 发布于 2024-04-10 22:15
- 阅读 4226
SUI Move开发必知必会——如何构建一个基于zkLogin的SUI Move dApp?
SUI Move开发必知必会——如何构建一个基于zkLogin的SUI Move dApp?
rzexin 2024.04.08
1 前言
本文将在SUI区块链上使用React前端和Move合约构建笔记本Dapp,笔记本合约允许用户创建和删除笔记,该Dapp将集成zkLogin,以允许用户使用传统web2的登录方式实现安全的用户身份验证。
实践目标:
- 开发一个
React前端来与Move合约进行交互 - 在
Dapp中集成zkLogin以实现安全的用户身份验证 - 了解并利用
zkLogin的功能进行链上资产访问
2 依赖准备
2.1 样板代码获取
2.1.1 下载样板代码
$ git clone https://github.com/dacadeorg/zk-login-boilerplate2.1.2 依赖安装
$ yarn install2.1.3 样板代码结构说明
- 代码结构
zk-login-boilerplate/
├── download-sui-binaries.sh
├── download_zkey.sh
├── node_modules
├── package.json
├── public
├── README.md
├── src
│   ├── App.css
│   ├── App.js
│   ├── App.test.js
│   ├── assets
│   ├── AuthComponent.js
│   ├── components
│   ├── index.css
│   ├── index.js
│   ├── logo.svg
│   ├── reportWebVitals.js
│   └── setupTests.js
├── tsconfig.json
└── yarn.lock- 功能说明
public:此目录包含index.html文件,它是React应用程序的入口点;favicon.ico文件,该文件是出现在浏览器选项卡中的图标src:此目录包含index.js文件,它是React应用程序的入口;App.js文件,这是React的主要组件utils:此目录将包含用于与合约和zkLogin交互的辅助函数download_zhkey.sh:此文件是下载zkey.sh脚本文件,该脚本用户签名交易package.json:此文件包含React应用程序的依赖项和脚本
2.2 创建应用验证服务
我们将为应用程序设置Google OAuth凭据。由于zkLogin使用Oauth对用户进行身份验证并对交易进行签名,因此这是zkLogin工作所必需的。
2.2.1 访问Google控制台
https://console.cloud.google.com/
2.2.2 创建项目
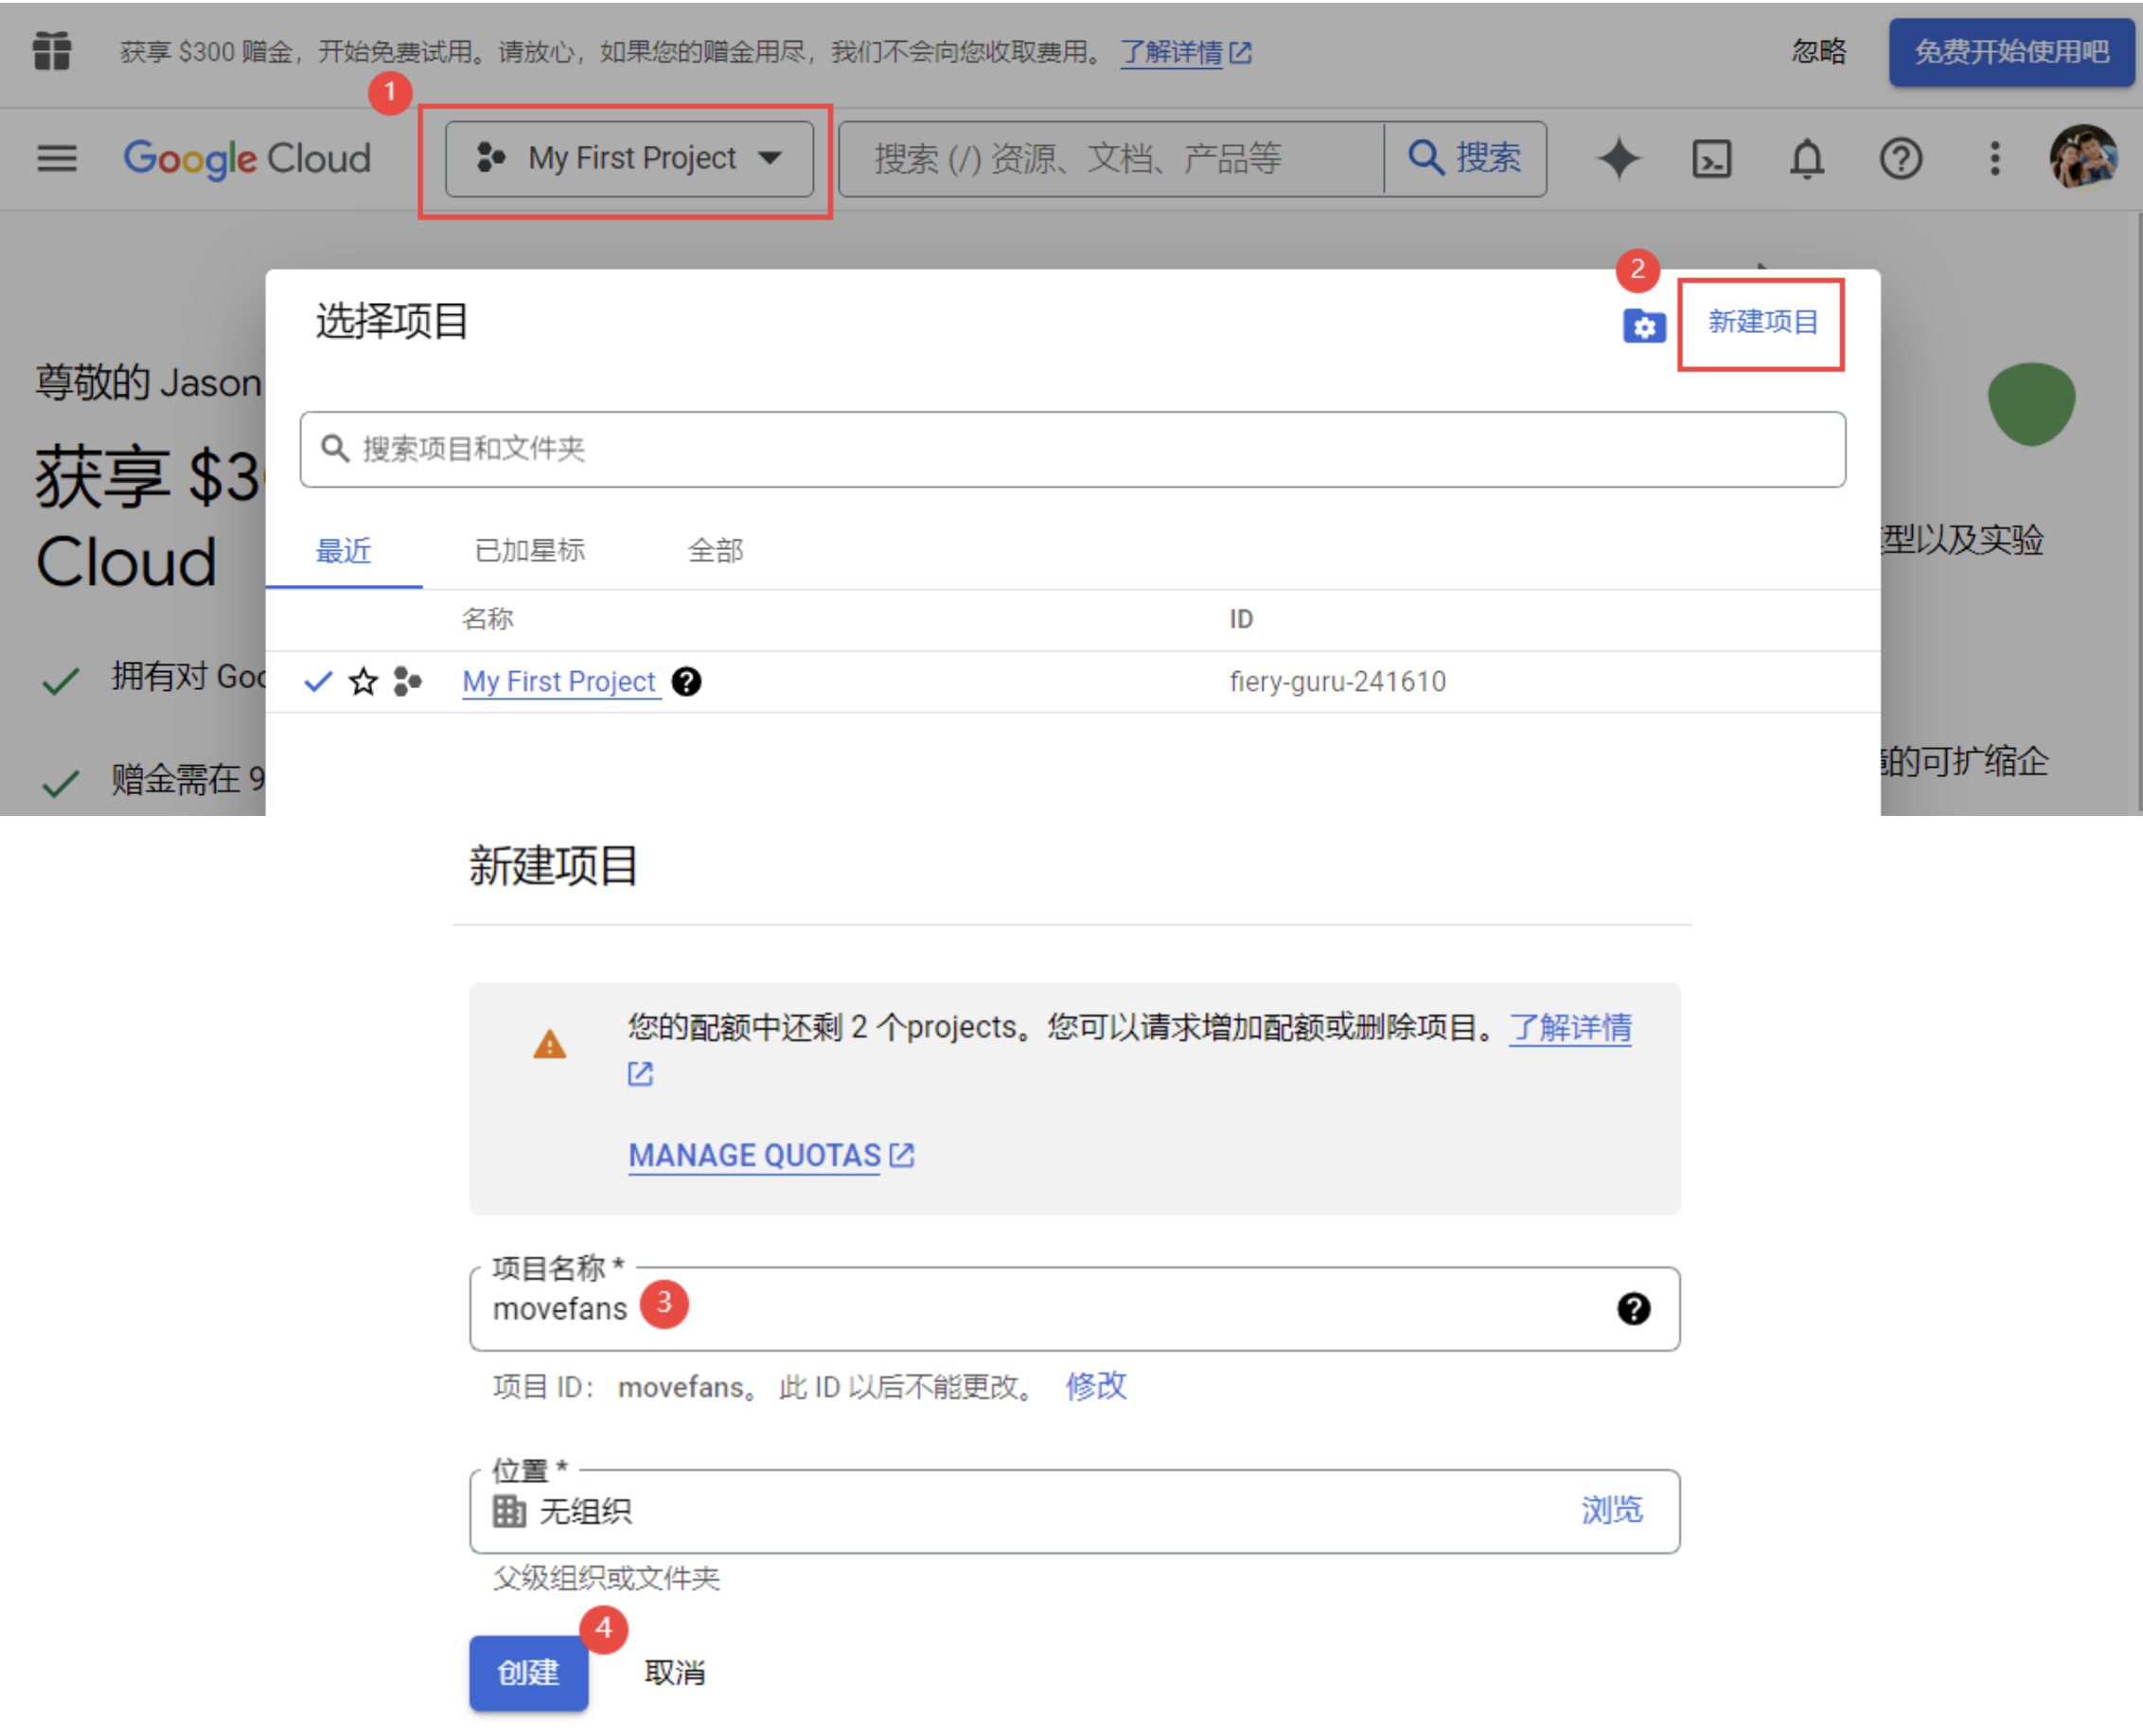
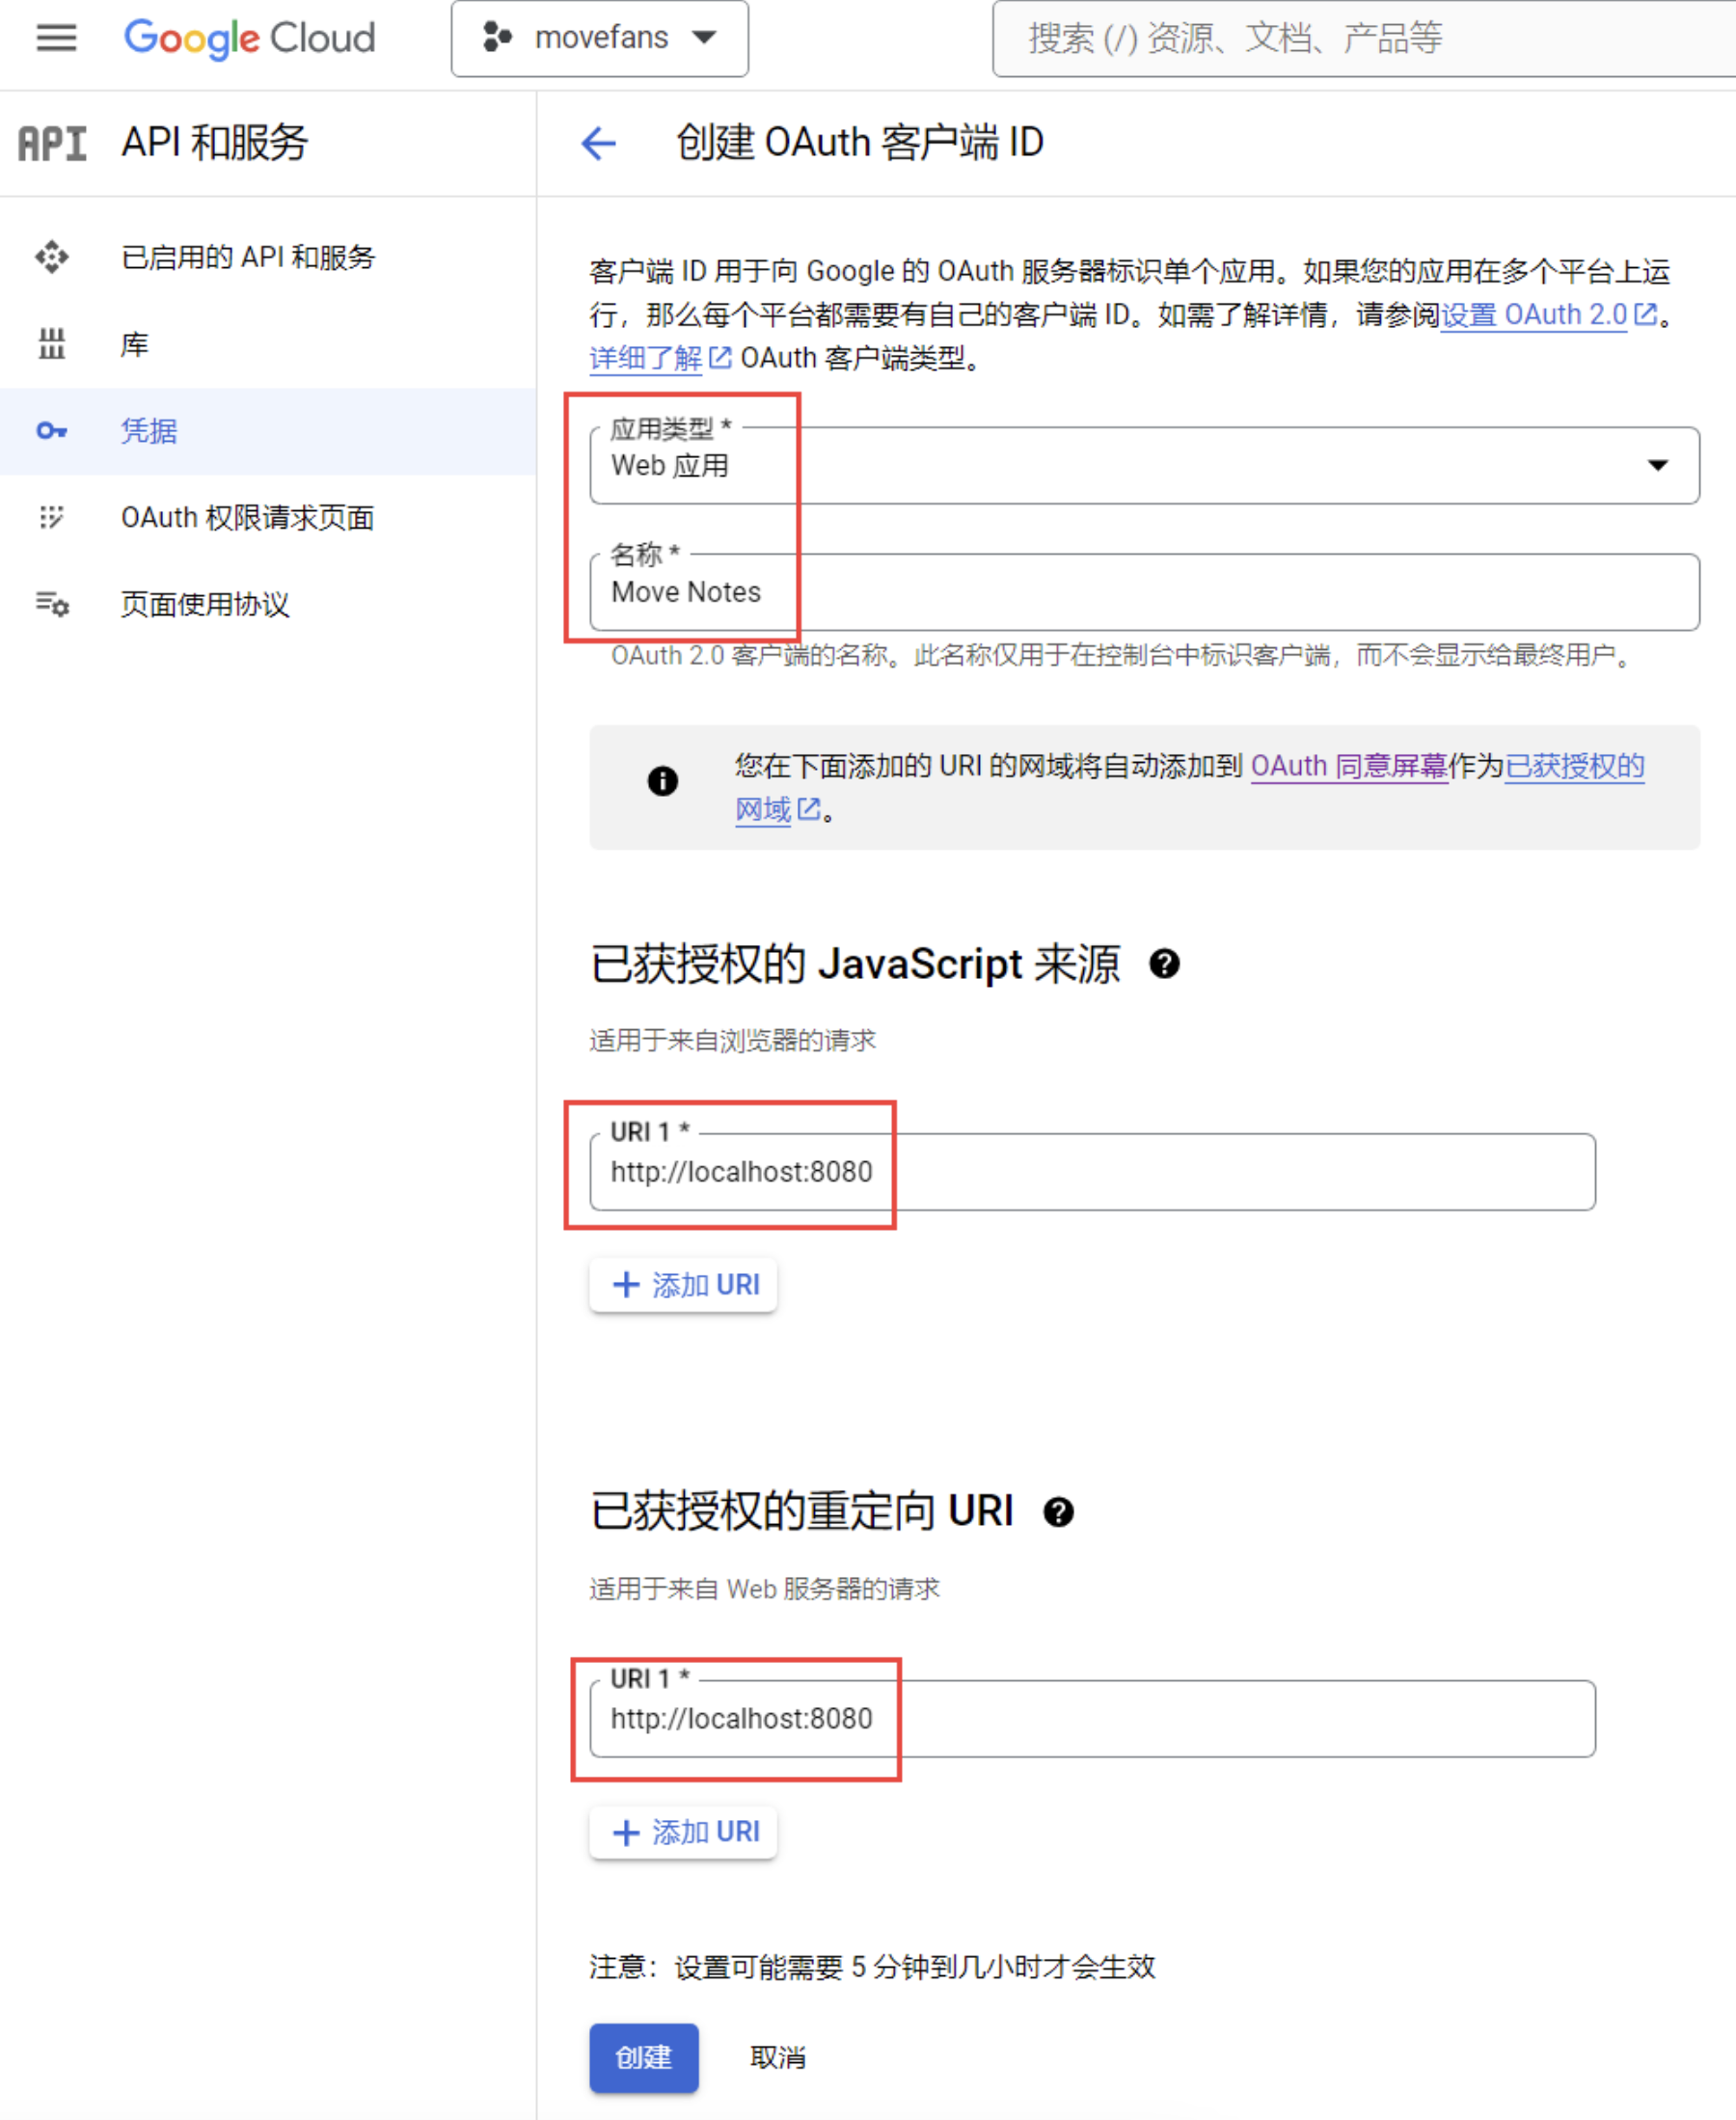
2.2.3 创建凭证

根据需要进行配置后,点击【创建】:
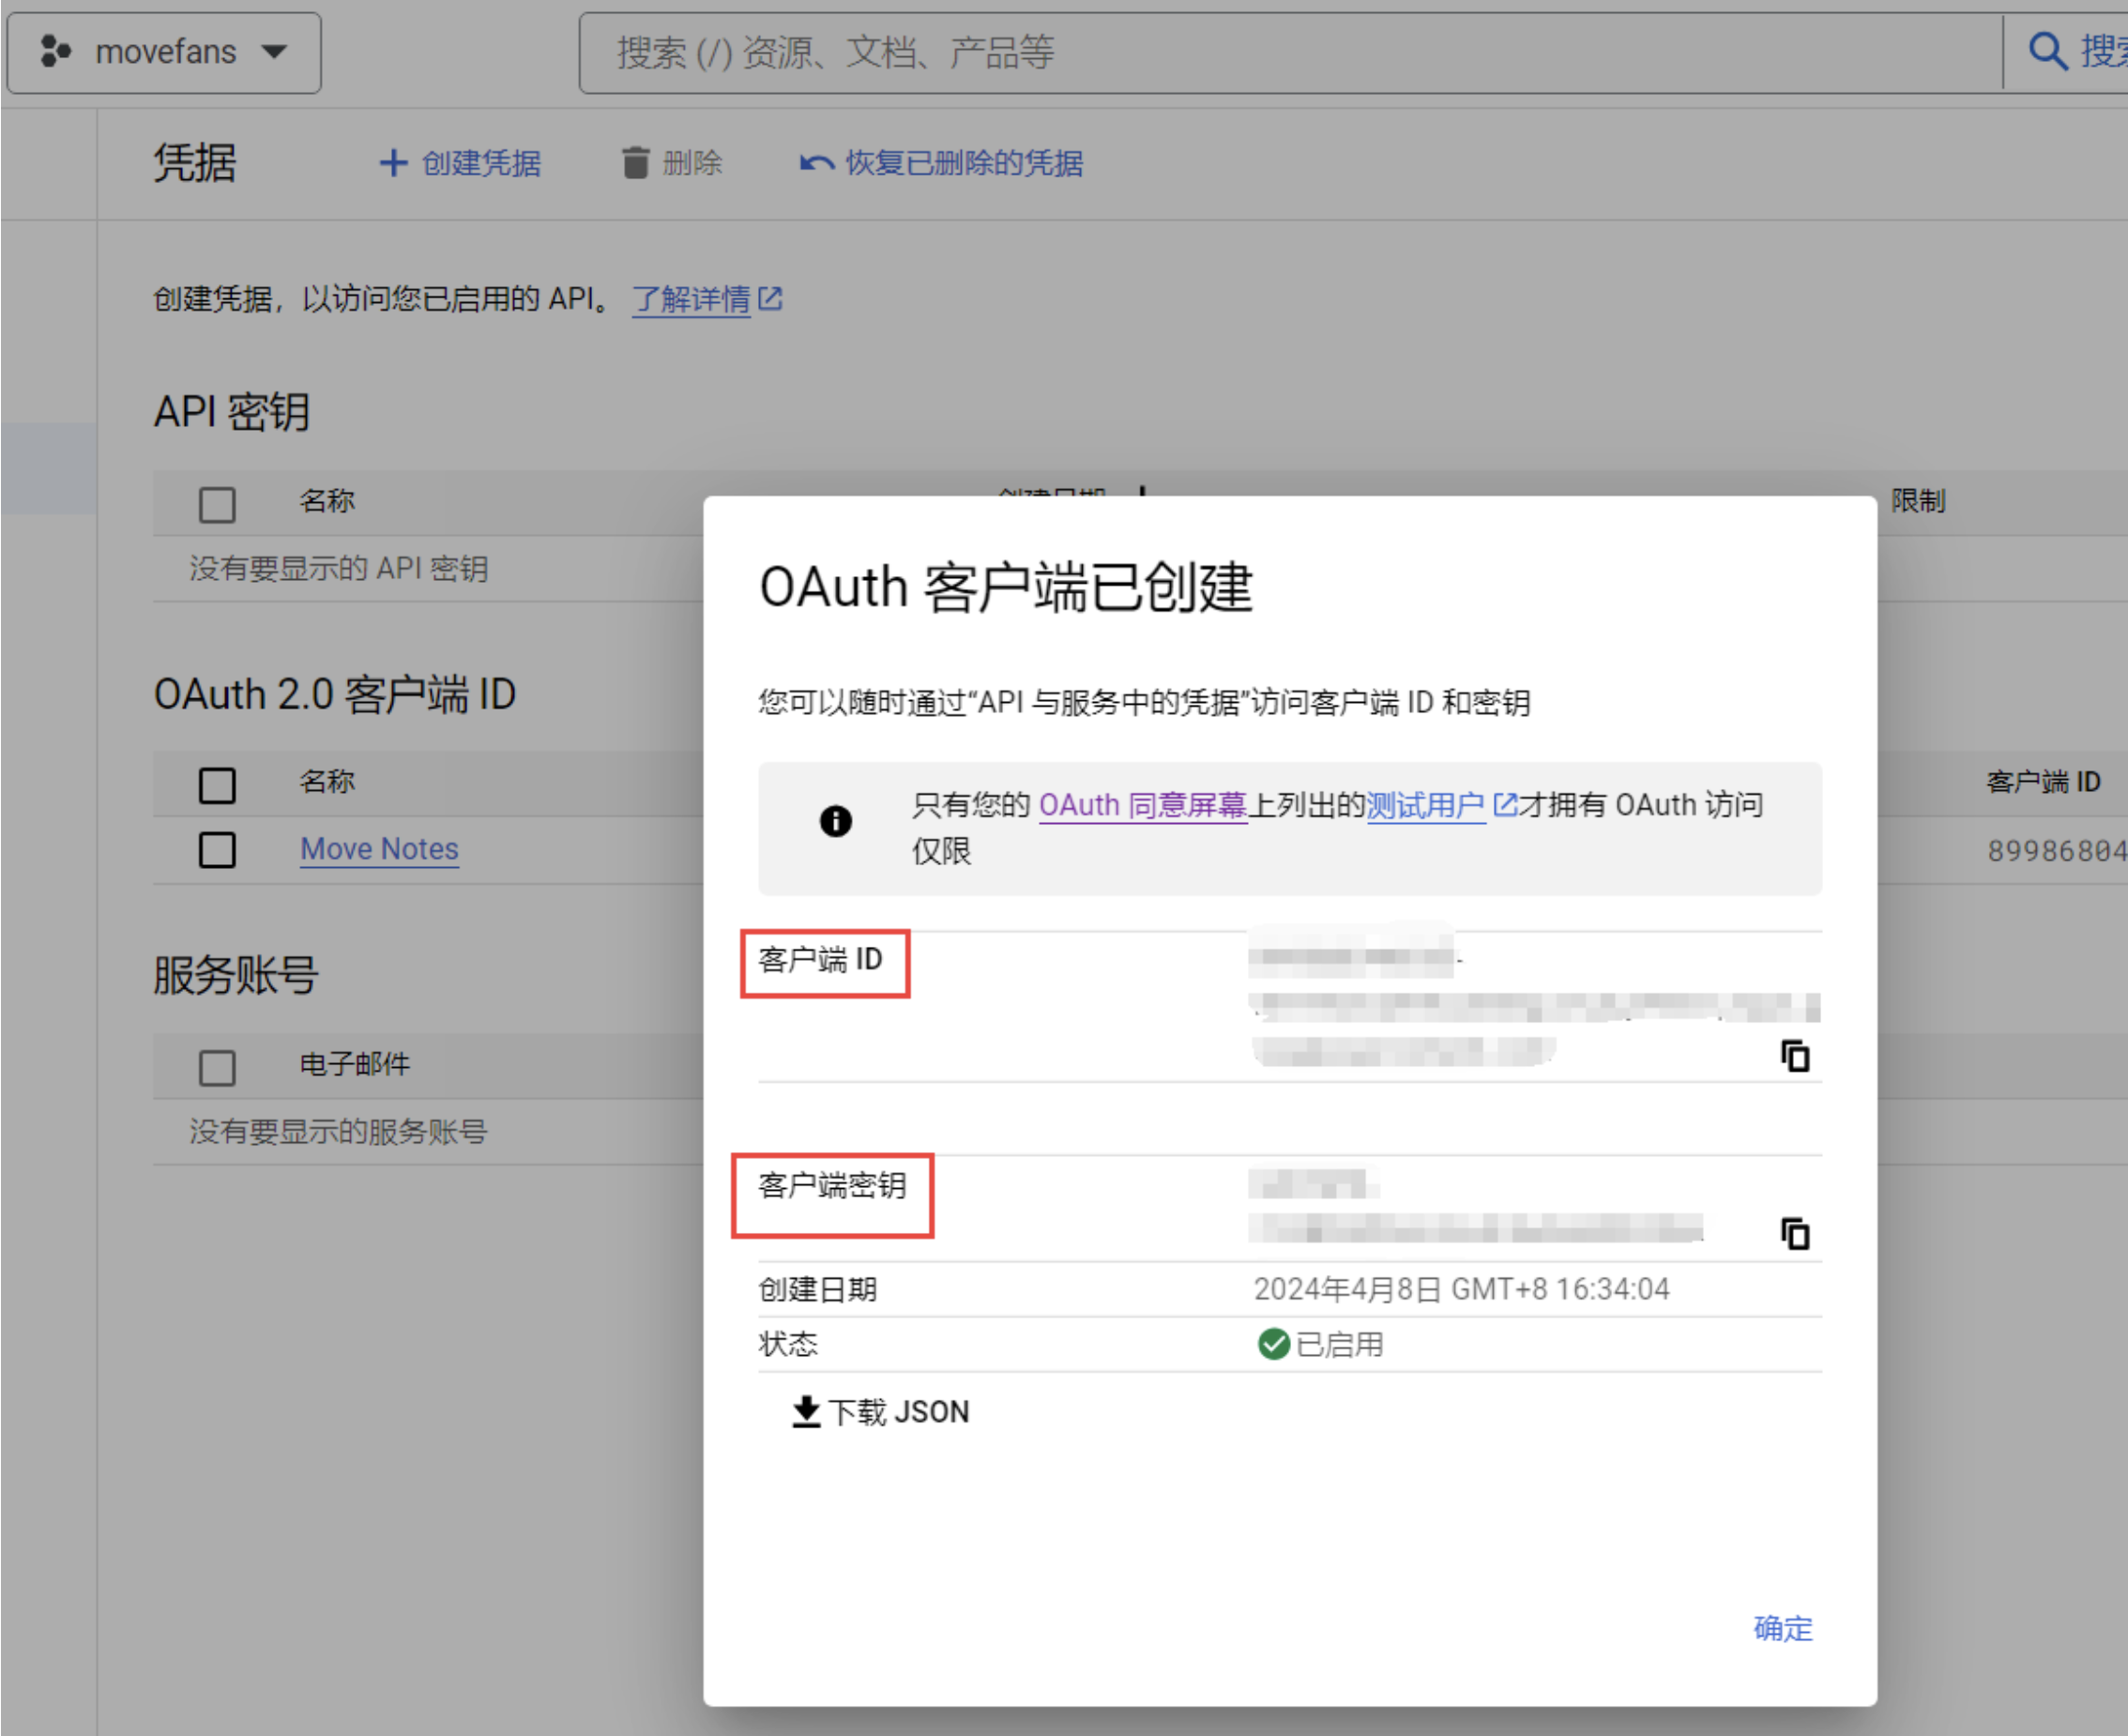
2.2.4 记录凭证
记录下创建客户端ID和客户端密钥到安全位置。
2.2.5 配置环境变量
在样板代码工程中,创建.env文件,添加以下环境变量:
REACT_APP_CLIENT_ID=xxx.apps.googleusercontent.com
REACT_APP_PROVER_URL=https://prover-dev.mystenlabs.com/v1
REACT_APP_REDIRECT_URL=http://localhost:8080
REACT_APP_OPENID_PROVIDER_URL=https://accounts.google.com/.well-known/openid-configuration
REACT_APP_FULLNODE_URL=http://127.0.0.1:9000
REACT_APP_PACKAGE_ID=0x3d133870aa4959c2804430d8d582d907537b521cff595fce865734abf96da560
环境变量说明:
- REACT_APP_CLIENT_ID:这就是前面创建的客户端ID,用于验证用户
- REACT_APP_PROVER_URL:这是证明器
URL,用于验证部分zkLogin签名,由zkLogin提供。 - REACT_APP_REDIRECT_URL:这是重定向URL。重定向URL用于在身份验证后重定向用户。它还用于在用户签名交易后重定向用户
- REACT_APP_OPENID_PROVIDER_URL:这是OPENID提供程序URL。OPENID提供器URL用于获取授权端点。授权端点用于对用户进行身份验证
- REACT_APP_FULLNODE_URL:这是节点
RPC URL,即SUI区块链地址,这里使用测试网 - REACT_APP_PACKAGE_ID:这是合约地址,在合约开发章节中部署合约后得到的
PackageID
2.3 运行本地网络
2.3.1 启动本地测试网
$ RUST_LOG="off,sui_node=info" ./target/release/sui-test-validator
Graphql port not provided. Graphql service will not run.
`with_indexer` flag unset. Indexer service will not run.
Starting Sui validator with config: ClusterTestOpt {
    env: NewLocal,
    faucet_address: Some(
        "127.0.0.1:9123",
    ),
    fullnode_address: Some(
        "0.0.0.0:9000",
    ),
    epoch_duration_ms: Some(
        60000,
    ),
    indexer_address: None,
    pg_address: postgres:*****@localhost:5432/sui_indexer,
    config_dir: None,
    graphql_address: None,
}

......

Fullnode RPC URL: http://127.0.0.1:9000
Keys saved as Base64 with 33 bytes `flag || privkey` ($BASE64_STR).
        To see Bech32 format encoding, use `sui keytool export $SUI_ADDRESS` where
        $SUI_ADDRESS can be found with `sui keytool list`. Or use `sui keytool convert $BASE64_STR`.
Faucet URL: http://0.0.0.0:9123

......
2.3.2 添加并切换到本地网络
$ sui client new-env --alias localnet --rpc http://127.0.0.1:9000

$ sui client switch --env localnet
Active environment switched to [localnet]

$ sui client envs
╭───────────┬───────────────────────────────────────┬────────╮
│ alias     │ url                                   │ active │
├───────────┼───────────────────────────────────────┼────────┤
│ mainnet   │ https://sui-mainnet.nodeinfra.com:443 │        │
│ testnet   │ https://fullnode.testnet.sui.io:443   │        │
│ devnet    │ https://fullnode.devnet.sui.io:443    │        │
│ localnet  │ http://127.0.0.1:9000                 │ *      │
╰───────────┴───────────────────────────────────────┴────────╯
2.3.3 领水
该领水地址将是后续部署笔记合约的地址。
$ export JASON=0x5c5882d73a6e5b6ea1743fb028eff5e0d7cc8b7ae123d27856c5fe666d91569a

$ curl --location --request POST 'http://127.0.0.1:9123/gas' --header 'Content-Type: application/json' \
--data-raw "{
    \"FixedAmountRequest\": {
        \"recipient\": \"${JASON}\"
    }
}"
{"transferredGasObjects":[{"amount":200000000000,"id":"0x40abfd0db528a45305c451b0d42b5fd1b5bb877606e044e9c7b1dd2e00cfe74f","transferTxDigest":"AiVCygkwL1y8iszWYZeoPMNZbr7cBMNM19tWV94wPHYL"},{"amount":200000000000,"id":"0x6fb9c3ad089cb97663241c79aee304dde81ae3b8caf864ece096f1a2af520300","transferTxDigest":"AiVCygkwL1y8iszWYZeoPMNZbr7cBMNM19tWV94wPHYL"},{"amount":200000000000,"id":"0x829f5a16abd7b3597b68b2d7280c5211b5c344cdec680de08d120c3bb59d310e","transferTxDigest":"AiVCygkwL1y8iszWYZeoPMNZbr7cBMNM19tWV94wPHYL"},{"amount":200000000000,"id":"0xc42638c19dabd3dbaba60d809883587e3dae8c92b4167946efad21495a2f7331","transferTxDigest":"AiVCygkwL1y8iszWYZeoPMNZbr7cBMNM19tWV94wPHYL"},{"amount":200000000000,"id":"0xcf27a3c2f6bb1a34e853537f6529a7e7e2951efb3d6ec779961efaccf77d562c","transferTxDigest":"AiVCygkwL1y8iszWYZeoPMNZbr7cBMNM19tWV94wPHYL"}],"error":null}

$ sui client gas
[warn] Client/Server api version mismatch, client api version : 1.22.0, server api version : 1.23.0
╭────────────────────────────────────────────────────────────────────┬────────────────────┬──────────────────╮
│ gasCoinId                                                          │ mistBalance (MIST) │ suiBalance (SUI) │
├────────────────────────────────────────────────────────────────────┼────────────────────┼──────────────────┤
│ 0x40abfd0db528a45305c451b0d42b5fd1b5bb877606e044e9c7b1dd2e00cfe74f │ 200000000000       │ 200.00           │
│ 0x6fb9c3ad089cb97663241c79aee304dde81ae3b8caf864ece096f1a2af520300 │ 200000000000       │ 200.00           │
│ 0x829f5a16abd7b3597b68b2d7280c5211b5c344cdec680de08d120c3bb59d310e │ 200000000000       │ 200.00           │
│ 0xc42638c19dabd3dbaba60d809883587e3dae8c92b4167946efad21495a2f7331 │ 200000000000       │ 200.00           │
│ 0xcf27a3c2f6bb1a34e853537f6529a7e7e2951efb3d6ec779961efaccf77d562c │ 200000000000       │ 200.00           │
╰────────────────────────────────────────────────────────────────────┴────────────────────┴──────────────────╯
3 合约开发
3.1 初始化合约工程
$ sui move new notes3.2 编写合约代码
这是一个非常简单的笔记合约示例,允许用户创建和删除笔记。
#[lint_allow(self_transfer)]
module bityoume::notes {
    use std::string::String;

    public struct Notes has key {
        id: UID
    }

    public struct Note has key, store {
        id: UID,
        title: String,
        body: String
    }

    #[allow(unused_function)]
    fun init(ctx: &mut TxContext) {
        let notes = Notes{
            id: sui::object::new(ctx),
        };
        transfer::share_object(notes)
    }

    public fun create_note(title: String, body: String, ctx: &mut TxContext) {
        let note = Note {
            id: object::new(ctx),
            title,
            body
        };
        transfer::transfer(note, tx_context::sender(ctx))
    }

    public fun delete_note(note: Note, _ctx: &mut TxContext) {
        let Note {id, title: _, body: _} = note;
        sui::object::delete(id)
    }
}
3.3 部署合约到本地网
- 使用前面领水地址,进行部署
$ sui client publish --gas-budget 100000000- 记录合约初始化创建
PackageID和共享的笔记本notes对象ID
export PACKAGE_ID=0x3d133870aa4959c2804430d8d582d907537b521cff595fce865734abf96da560

export NOTES=0x27cf2811a205a73ae03be19ee6dd098d0dd7f87b4a09d654c2b6f77617f65d1d
3.4 合约基本功能测试
合约比较简单,基本功能测试略。
4 前端开发
4.1 服务开发
4.1.1 初始化SUI客户端
SUI客户端适用于跟区块链节点进行交互的,会从链上获取状态和签名交易提交上链等。
- 创建文件
src/utils/suiClient.ts
- 添加代码
import { SuiClient } from "@mysten/sui.js/client";

// node rpc url
const FULLNODE_URL = process.env.REACT_APP_FULLNODE_URL;

// the id of the package of a deployed contract
export const PACKAGE_ID = process.env.REACT_APP_PACKAGE_ID;

// 创建SuiClient实例
export const SUI_CLIENT = new SuiClient({ url: FULLNODE_URL });
4.1.2 创建SUI服务
SUI服务是封装了与SUI链交互的相关方法,便于上层组件进行使用。
- 创建文件
src/utils/suiService.ts
- 添加代码
import { SUI_CLIENT } from "./suiClient";

export class SuiService {

  // 获取钱包余额,单位:SUI,保留2位小数
  async getFormattedBalance(owner: string) {
    const res = await SUI_CLIENT.getBalance({
      owner,
    });
    return Number(Number(res.totalBalance) / 1_000_000_000).toFixed(2);
  }
}
4.1.3 创建认证服务
- 创建文件
src/utils/authService.ts
- 导入依赖包
说明:
- axios:
axios是一个用于浏览器和Node.js的基于Promise的HTTP客户端。它用于发出HTTP请求- SUI_CLIENT:这是创建的
SUI客户端- Ed25519Keypair:这是来自
@mysten/sui.js/keypairs/Ed25519软件包的Ed25519密钥对- generateOnce:这是
@mysten/zklogin包中的generateOnce函数- generateRandomness:这是
@mysten/zklogin包中的generateRandom函数- getExtendedEphemeralPublicKey:这是
@mysten/zklogin包中的getExtendedEphemeralPublicKey函数,将使用它来生成一个扩展的临时公钥(extended ephemeral public key)- jwtToAddress:这是
@mysten/zklogin包中的jwtToAddress函数,将使用它从JWT获取地址。JWT是用于对用户进行身份验证的令牌- genAddressSeed:这是
@mysten/zklogin包中的genAddressSeed函数,将使用它来生成地址
import axios from "axios";
import { SUI_CLIENT } from "./suiClient";
import { Ed25519Keypair } from "@mysten/sui.js/keypairs/ed25519";
import {
  generateNonce,
  generateRandomness,
  getExtendedEphemeralPublicKey,
} from "@mysten/zklogin";
import { jwtToAddress } from "@mysten/zklogin";
import { genAddressSeed, getZkLoginSignature } from "@mysten/zklogin";
import { jwtDecode } from "jwt-decode";
import { SerializedSignature } from "@mysten/sui.js/cryptography";- 导入环境变量
const PROVER_URL = process.env.REACT_APP_PROVER_URL;
const REDIRECT_URL = process.env.REACT_APP_REDIRECT_URL;
const OPENID_PROVIDER_URL = process.env.REACT_APP_OPENID_PROVIDER_URL;
const CLIENT_ID = process.env.REACT_APP_CLIENT_ID;- 实现认证服务
export class AuthService {
  static getAddressSeed() {}

  static getEd25519Keypair(): Ed25519Keypair {}

  static async getPartialZkLoginSignature(): Promise<any> {}

  private static async verifyPartialZkLoginSignature(zkpRequestPayload: any) {}

  static async generateZkLoginSignature(
    userSignature: string
  ): Promise<SerializedSignature> {}

  static getMaxEpoch() {}

  static getRandomness() {}

  private static getJwtData() {}

  private static decodeJwt(): JwtPayload {}

  private static salt() {}

  static walletAddress() {}

  private static claims() {}

  private static hashcode(s: string) {}

  static isAuthenticated() {}

  static jwt() {}

  async login() {}
}getAddressSeed(获取地址种子)
此函数用于获取地址种子,地址种子用于生成密钥对。
实现逻辑是:
- 调用
decodeJwt函数从sessionStorage获取sui_jwt_token- 调用
salt函数,从sui_jwt_token中获取用户hashcode作为其盐值- 调用
genAddressSeed函数,传入所需参数,生成地址种子
  static getAddressSeed() {
    const jwt = AuthService.decodeJwt();
    const salt = AuthService.salt();
    return genAddressSeed(
      BigInt(salt!),
      "sub",
      jwt.sub,
      jwt.aud.toString()
    ).toString();
  }

  private static decodeJwt(): JwtPayload {
    const jwt = sessionStorage.getItem("sui_jwt_token");
    return jwtDecode(jwt) as JwtPayload;
  }

  private static salt() {
    const email = AuthService.claims()["email"];
    return AuthService.hashcode(email);
  }

  private static claims() {
    const token = AuthService.jwt();
    if (token) return JSON.parse(atob(token.split(".")[1]));
  }

  static jwt() {
    return sessionStorage.getItem("sui_jwt_token");
  }

  private static hashcode(s: string) {
    var h = 0,
      l = s.length,
      i = 0;
    if (l > 0) while (i < l) h = ((h << 5) - h + s.charCodeAt(i++)) | 0;
    return h.toString();
}getEd25519Keypair(获取keypair对象)
此函数用于获取
Ed25519 keypair对象。实现逻辑是:
- 调用
getJwtData函数,从sessionStorage获取jwt_data- 从临时
keypair对象中读取publicKey和secretKey- 构造
Ed25519Keypair对象后返回
  static getEd25519Keypair(): Ed25519Keypair {
    const jwtData = AuthService.getJwtData();
    const publicKey = new Uint8Array(
      Object.values(jwtData.ephemeralKeyPair.keypair.publicKey)
    );
    const secretKey = new Uint8Array(
      Object.values(jwtData.ephemeralKeyPair.keypair.secretKey)
    );
    return new Ed25519Keypair({ publicKey, secretKey });
  }

  private static getJwtData() {
    return JSON.parse(sessionStorage.getItem("jwt_data"));
}getPartialZkLoginSignature(获取部分zkLogin签名)
此函数用于获取部分
zkLogin签名,此签名用于对交易进行签名。实现逻辑是:
- 调用
getEd25519Keypair函数获取到Ed25519Keypair对象- 调用
getExtendedEphemeralPublicKey函数生成扩展的临时公钥- 构造生成待验证的负载信息(
verificationPayload),信息包括:JWT、扩展的临时公钥、最大世代、随机数、盐值和声明名称(keyClaimName)- 调用
getMaxEpoch获取最大世代以及调用getRandomness获取随机数,都是为了创建nonce- 调用
verifyPartialZkLoginSignature接口通过验证部分zkLogin签名来验证用户
  static async getPartialZkLoginSignature(): Promise<any> {
    const keyPair = AuthService.getEd25519Keypair();
    const extendedEphemeralPublicKey = getExtendedEphemeralPublicKey(
      keyPair.getPublicKey()
    );
    const verificationPayload = {
      jwt: AuthService.jwt(),
      extendedEphemeralPublicKey,
      maxEpoch: this.getMaxEpoch(),
      jwtRandomness: this.getRandomness(),
      salt: AuthService.salt(),
      keyClaimName: "sub",
    };
    return await AuthService.verifyPartialZkLoginSignature(verificationPayload);
  }

  static getMaxEpoch() {
    return AuthService.getJwtData().maxEpoch;
  }

  static getRandomness() {
    return AuthService.getJwtData().randomness;
  }

  private static salt() {
    const email = AuthService.claims()["email"];
    return AuthService.hashcode(email);
}verifyPartialZkLoginSignature(验证部分zkLogin签名)
此函数用于通过验证部分
zkLogin签名来验证用户。实现逻辑:
- 该接口会向证明器发起
POST请求,提供待验证的负载信息(verificationPayload)- 若成功,会返回签名信息
  private static async verifyPartialZkLoginSignature(zkpRequestPayload: any) {
    try {
      const proofResponse = await axios.post(PROVER_URL, zkpRequestPayload, {
        headers: {
          "content-type": "application/json",
        },
      });
      const partialZkLoginSignature =
        proofResponse.data as PartialZkLoginSignature;
      return partialZkLoginSignature;
    } catch (error) {
      console.log("failed to reqeust the partial sig: ", error);
      return {};
    }
}generateZkLoginSignature(生成zkLogin签名)
此函数用于生成
zkLogin签名。实现逻辑:
- 调用
getPartialZkLoginSignature函数获取部分zkLogin签名- 调用
getAddressSeed获取地址种子- 调用
getMaxEpoch获取最大世代- 最后调用
getZkLoginSignature函数生成zkLogin签名
  static async generateZkLoginSignature(
    userSignature: string
  ): Promise<SerializedSignature> {
    const partialZkLoginSignature =
      await AuthService.getPartialZkLoginSignature();
    const addressSeed = AuthService.getAddressSeed();
    const maxEpoch = AuthService.getMaxEpoch();
    return getZkLoginSignature({
      inputs: {
        ...partialZkLoginSignature,
        addressSeed,
      },
      maxEpoch,
      userSignature,
    });
}walletAddress(获取钱包地址)
此函数用于根据用户通过
OAuth进行身份验证时返回的用户电子邮件获取钱包地址实现逻辑:
- 从
sessionStorage获取sui_jwt_token- 并获取其中的
hashcode作为其盐值- 调用
jwtToAddress函数生成钱包地址,参数是sui_jwt_token数据和盐值
  static walletAddress() {
    const email = AuthService.claims()["email"];
    return jwtToAddress(AuthService.jwt(), AuthService.hashcode(email));
}isAuthenticated(检查是否已认证身份)
此函数用于检查用户是否已通过身份验证。
实现逻辑:
- 从
sessionStorage获取sui_jwt_token,并检查它是否为null- 不为
null则用户已通过身份认证,反之则用户未通过身份认证
  static isAuthenticated() {
    const token = AuthService.jwt();
    return token && token !== "null";
}login(用户登录)
此函数用于用户登录。
实现逻辑:
- 调用
getLatestSuiSystemState函数,获取最新的SUI链状态,解构出当前的世代- 基于当前世代,创建最大世代(
maxEpoch)- 创建
Ed25519Keypair对象ephemeralKeyPair- 调用
generateRandomness函数生成随机数- 调用
generateNonce函数,传入ephemeralKeyPair公钥、最大世代、随机数,构造出nonce- 构造
jwtData对象,序列化后存储在sessionStorage的jwt_data中- 然后,它向
OpenID提供者URL发出GET请求,以获取授权端点- 最后将用户重定向到授权端点
async login() {
    const { epoch } = await SUI_CLIENT.getLatestSuiSystemState();

    const maxEpoch = Number(epoch) + 2;
    const ephemeralKeyPair = new Ed25519Keypair();
    const randomness = generateRandomness();
    const nonce = generateNonce(
      ephemeralKeyPair.getPublicKey(),
      maxEpoch,
      randomness
    );
    const jwtData = {
      maxEpoch,
      nonce,
      randomness,
      ephemeralKeyPair,
    };

    console.log({ jwtData });

    sessionStorage.setItem("jwt_data", JSON.stringify(jwtData));

    const params = new URLSearchParams({
      client_id: CLIENT_ID,
      redirect_uri: REDIRECT_URL,
      response_type: "id_token",
      scope: "openid email",
      nonce: nonce,
    });

    console.log({ params });
    try {
      const { data } = await axios.get(OPENID_PROVIDER_URL);
      console.log({ data });
      const authUrl = `${data.authorization_endpoint}?${params}`;
      window.location.href = authUrl;
    } catch (error) {
      console.error("Error initiating Google login:", error);
    }
  }
}- JWT负载接口定义
在这个接口中,定义了一些标准的
JWT声明,如iss(发行人)、sub(主题)、aud(受众)等这些属性都是可选的
export interface JwtPayload {
  iss?: string;
  sub?: string;
  aud?: string[] | string;
  exp?: number;
  nbf?: number;
  iat?: number;
  jti?: string;
}- 部分zkLogin签名的类型定义
这里边定义了部分
zkLogin签名,较完整zkLogin签名类型删除了addressSeed属性。实现逻辑:
Parameters工具类型返回一个元组(tuple),其中包含了函数参数的类型。Parameters<typeof getZkLoginSignature>返回了getZkLoginSignature函数的参数类型的元组- 使用
["0"]索引操作,我们可以提取这个元组中的第一个元素(即第一个参数的类型)- 在获取到第一个参数的类型之后,继续使用
["inputs"]索引操作来获取inputs属性的类型- 通过
Omit类型操作符,从这个类型中删除addressSeed属性,从而创建一个新的类型PartialZkLoginSignature
export type PartialZkLoginSignature = Omit<
  Parameters<typeof getZkLoginSignature>["0"]["inputs"],
  "addressSeed"
>;
4.1.4 创建笔记服务
该服务封装了跟笔记合约交互的接口
- 创建文件
src/utils/notesService.ts
addNote(新建笔记)
调用此函数可以创建笔记
  async addNote(title: string, body: string) {
    const txb = new TransactionBlock();
    const txData = {
      target: `${PACKAGE_ID}::notes::create_note`,
      arguments: [txb.pure.string(title), txb.pure.string(body)],
    };
    return this.makeMoveCall(txData, txb);
}getNotes(查询笔记)
调用此函数可以查询笔记。
实现逻辑:
- 获取钱包地址
- 获取该地址所有对象
- 遍历对象获取对象类型和内容
- 返回类型是笔记类型的内容,即笔记数据
  async getNotes() {
    const sender = AuthService.walletAddress();
    let ownedObjects = await SUI_CLIENT.getOwnedObjects({
      owner: sender,
    });
    let ownedObjectsDetails = await Promise.all(
      ownedObjects.data.map(async (obj) => {
        return await SUI_CLIENT.getObject({
          id: obj.data.objectId,
          options: { showType: true, showContent: true },
        });
      })
    );
    return ownedObjectsDetails
      .filter((obj) => {
        return `${PACKAGE_ID}::notes::Note` === obj.data.type;
      })
      .map((obj) => obj.data.content["fields"]);
}deleteNote(删除笔记)
调用此函数可以删除笔记。
  async deleteNote(id: any) {
    const sender = AuthService.walletAddress();
    const txb = new TransactionBlock();
    txb.setSender(sender);
    const txData = {
      target: `${PACKAGE_ID}::notes::delete_note`,
      arguments: [txb.object(id.id)],
    };
    await this.makeMoveCall(txData, txb);
}makeMoveCall(合约调用)
调用此函数会签名交易,并发起合约调用。
实现逻辑:
- 调用
AuthService.getEd25519Keypair获取密钥对keypair对象- 调用
AuthService.walletAddress()获取钱包地址,它将交易的发送方设置为用户的钱包地址- 构造交易块交易数据,并使用
keypair私钥签名交易数据,得到用户签名数据userSignature- 将用户签名数据
userSignature作为参数,调用AuthService.generateZkLoginSignature函数获取到zkLogin签名数据zkLoginSignature- 使用
zkLogin签名数据zkLoginSignature作为交易的真正签名,提交交易上链
  private async makeMoveCall(txData: any, txb: TransactionBlock) {
    const keypair = AuthService.getEd25519Keypair();
    const sender = AuthService.walletAddress();
    txb.setSender(sender);
    txb.moveCall(txData);
    const { bytes, signature: userSignature } = await txb.sign({
      client: SUI_CLIENT,
      signer: keypair,
    });
    const zkLoginSignature = await AuthService.generateZkLoginSignature(
      userSignature
    );
    return SUI_CLIENT.executeTransactionBlock({
      transactionBlock: bytes,
      signature: zkLoginSignature,
    });
  }
4.2 组件开发
4.2.1 设置路由
- 修改文件
src/index.js
- 修改后代码
我们设置了2个路由:
/notes:渲染App组件/:渲染Callback组件(当前还没有,进行创建)
import React from "react";
import ReactDOM from "react-dom/client";
import { BrowserRouter as Router, Routes, Route } from "react-router-dom";
import "./index.css";
import App from "./App";
import reportWebVitals from "./reportWebVitals";
import "bootstrap-icons/font/bootstrap-icons.css";
import "bootstrap/dist/css/bootstrap.min.css";
import Callback from "./Callback";

const root = ReactDOM.createRoot(document.getElementById("root"));
root.render(
  <Router>
    <Routes>
      <Route path="/notes" element={<App />} />
      <Route path="/" element={<Callback />} />
    </Routes>
  </Router>
);

reportWebVitals();
4.2.2 创建Callback组件
- 创建文件
src/Callback.js
- 添加代码
此回调组件将用于处理来自身份验证服务的回调。
实现逻辑:
- 使用
useEffect钩子函数在加载此页面时触发handleCallback函数- 该函数从
URL中获取JWT,并将其存储在sessionStorage中- 再将用户重定向到
/notes路由
import React, { useEffect } from "react";

const Callback = () => {
  useEffect(() => {
    const handleCallback = async () => {
      try {
        const params = new URLSearchParams(window.location.hash.substr(1));
        const jwtToken = params.get("id_token");

        sessionStorage.setItem("sui_jwt_token", jwtToken);
        window.location.href = "/notes";
      } catch (error) {
        console.error("Error handling callback:", error);
      }
    };

    handleCallback();
  }, []);

  return (
    <div>
      <p>Processing callback...</p>
    </div>
  );
};

export default Callback;
4.2.3 创建App组件
- 修改文件
src/App.js
- 导入依赖包
import React, { useState, useCallback, useEffect } from "react";
import { Container, Nav } from "react-bootstrap";
import Wallet from "./components/Wallet";
import Notes from "./components/notes/Notes";
import Cover from "./components/utils/Cover";
import coverImg from "./assets/img/notebook.jpg";
import { Notification } from "./components/utils/Notifications";
import "./App.css";
import { AuthService } from "./utils/authService";
import { SuiService } from "./utils/suiService";- 创建App组件
实现逻辑:
- 创建
getBalance函数,用于获取用户钱包余额。若用户已经登录成功(认证成功)将能获取到钱包余额- 创建
logout函数,用于用于退出,将清空sessionStorage,并重定向到/notes路由Notification组件已经实现了,用于展示通知信息- 如果用户已经通过身份验证,将呈现钱包组件和
Notes组件。钱包组件用于显示用户的钱包地址和余额,Notes组件用于显示用户笔记(后续将实现该组件)- 如果用户未通过身份验证,将呈现
Cover组件,让用户进行登录,该组件也已实现
const App = () => {
  const [balance, setBalance] = useState("0");

  let walletAddress;
  const suiService = new SuiService();

  const getBalance = useCallback(async () => {
    try {
      if (AuthService.isAuthenticated()) {
        setBalance(
          await suiService.getFormattedBalance(AuthService.walletAddress())
        );
      }
    } catch (error) {
      console.log({ error });
    } finally {
    }
  });

  const logout = async () => {
    sessionStorage.clear();

    window.location.href = "/notes";
  };

  if (AuthService.isAuthenticated()) {
    walletAddress = AuthService.walletAddress();
  }

  useEffect(() => {
    getBalance();
  }, [getBalance]);

  return (
    <>
      <Notification />
      {AuthService.isAuthenticated() ? (
        <Container fluid="md">
          <Nav className="justify-content-end pt-3 pb-5">
            <Nav.Item>
              <Wallet
                address={walletAddress}
                amount={balance}
                symbol="SUI"
                destroy={logout}
              />
            </Nav.Item>
          </Nav>
          <main>
            <Notes />
          </main>
        </Container>
      ) : (
        <Cover name="SUI zkLogin Notes" coverImg={coverImg} />
      )}
    </>
  );
};

export default App;
4.2.4 创建Notes组件
- 创建目录和文件
Notes.js:此文件是笔记列表展示组件 Notes.js:此文件是单个笔记展示组件 AddNote.js:此文件是添加笔记组件
src
├── components
│   ├── notes
│   │   ├── AddNote.js
│   │   ├── Note.js
│ │ └── Notes.js- 创建
Note组件
在src/components/notes/Note.js中添加以下代码:
import React from "react";
import { Card, Button, Col } from "react-bootstrap";

const Note = ({ note, deleteNote }) => {
  const { id, title, body } = note;

  return (
    <Col key={id.id}>
      <Card className=" h-100">
        <Card.Body className="d-flex  flex-column text-center">
          <Card.Title>{title}</Card.Title>
          <Card.Text className="flex-grow-1 ">{body}</Card.Text>
          <Button
            variant="outline-dark"
            onClick={() => deleteNote(id)}
            className="w-100 py-3"
          >
            Delete
          </Button>
        </Card.Body>
      </Card>
    </Col>
  );
};

export default Note;- 创建
AddNote组件
在src/components/notes/AddNote.js中添加以下代码:
import React, { useState } from "react";
import PropTypes from "prop-types";
import { Button, Modal, Form, FloatingLabel } from "react-bootstrap";

const AddNote = ({ save }) => {
  const [title, setTitle] = useState("");
  const [body, setBody] = useState("");
  const isFormFilled = () => title && body;

  const [show, setShow] = useState(false);

  const handleClose = () => setShow(false);
  const handleShow = () => setShow(true);

  return (
    <>
      <Button
        onClick={handleShow}
        variant="dark"
        className="rounded-pill px-0"
        style={{ width: "38px" }}
      >
        <i className="bi bi-plus"></i>
      </Button>
      <Modal show={show} onHide={handleClose} centered>
        <Modal.Header closeButton>
          <Modal.Title>New Note</Modal.Title>
        </Modal.Header>
        <Form>
          <Modal.Body>
            <FloatingLabel
              controlId="inputTitle"
              label="Title"
              className="mb-3"
            >
              <Form.Control
                type="text"
                onChange={(e) => {
                  setTitle(e.target.value);
                }}
                placeholder="Title"
              />
            </FloatingLabel>
            <FloatingLabel
              controlId="inputBody"
              label="Body"
              className="mb-3"
            >
              <Form.Control
                as="textarea"
                placeholder="body"
                style={{ height: "80px" }}
                onChange={(e) => {
                  setBody(e.target.value);
                }}
              />
            </FloatingLabel>
          </Modal.Body>
        </Form>
        <Modal.Footer>
          <Button variant="outline-secondary" onClick={handleClose}>
            Close
          </Button>
          <Button
            variant="dark"
            disabled={!isFormFilled()}
            onClick={() => {
              save({
                title,
                body,
              });
              handleClose();
            }}
          >
            Save note
          </Button>
        </Modal.Footer>
      </Modal>
    </>
  );
};

AddNote.propTypes = {
  save: PropTypes.func.isRequired,
};

export default AddNote;- 创建
Notes组件
在src/components/notes/Notes.js中添加以下代码:
import React, { useEffect, useState, useCallback } from "react";
import { toast } from "react-toastify";
import AddNote from "./AddNote";
import Note from "./Note";
import Loader from "../utils/Loader";
import { Row } from "react-bootstrap";
import { NotificationSuccess, NotificationError } from "../utils/Notifications";
import { NotesService } from "../../utils/notesService";

const Notes = () => {
  const [notes, setNotes] = useState([]);
  const [loading, setLoading] = useState(false);

  const notesService = new NotesService();

  const getNotes = useCallback(async () => {
    try {
      setLoading(true);
      setNotes(await notesService.getNotes());
    } catch (error) {
      console.log({ error });
    } finally {
      setLoading(false);
    }
  });

  const addNote = async (data) => {
    try {
      setLoading(true);
      const { title, body } = data;
      await notesService.addNote(title, body);

      getNotes();
      toast(<NotificationSuccess text="A note added successfully." />);
    } catch (error) {
      console.log({ error });
      toast(<NotificationError text="Failed to create a note." />);
    } finally {
      setLoading(false);
    }
  };

  const deleteNote = async (id) => {
    try {
      await notesService.deleteNote(id);
      getNotes();

      toast(<NotificationSuccess text="Delete the note successfully" />);
    } catch (error) {
      toast(<NotificationError text="Failed to delete the note." />);
    } finally {
      setLoading(false);
    }
  };

  useEffect(() => {
    getNotes();
  }, []);

  return (
    <>
      {!loading ? (
        <>
          <div className="d-flex justify-content-between align-items-center mb-4">
            <h1 className="fs-4 fw-bold mb-0">ZK Login</h1>
            <AddNote save={addNote} />
          </div>
          <Row xs={1} sm={2} lg={3} className="g-3  mb-5 g-xl-4 g-xxl-5">
            {notes.map((_note) => (
              <Note
                note={{
                  ..._note,
                }}
                deleteNote={deleteNote}
              />
            ))}
          </Row>
        </>
      ) : (
        <Loader />
      )}
    </>
  );
};

export default Notes;
5 dApp测试
5.1 启动
$ yarn start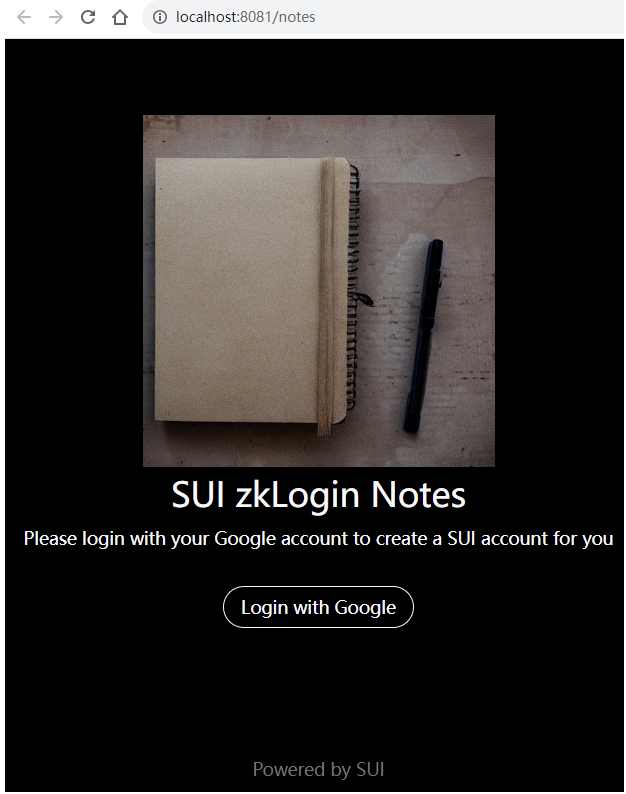
5.2 登录
- 点击
Login with Google按钮进行登陆

- 当完成身份认证后,将看到如下页面
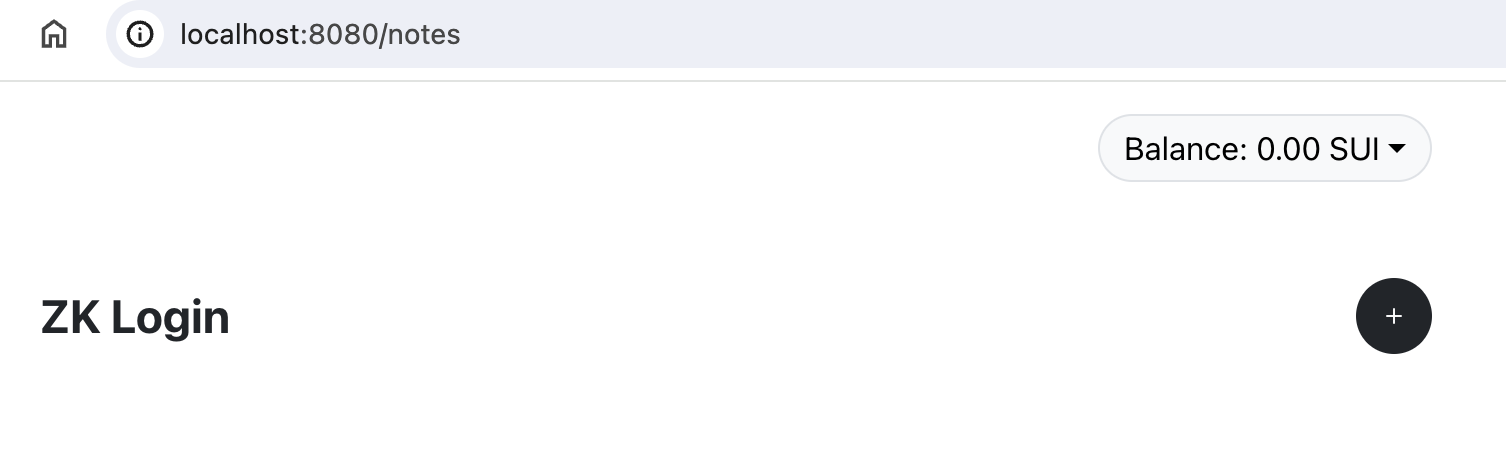
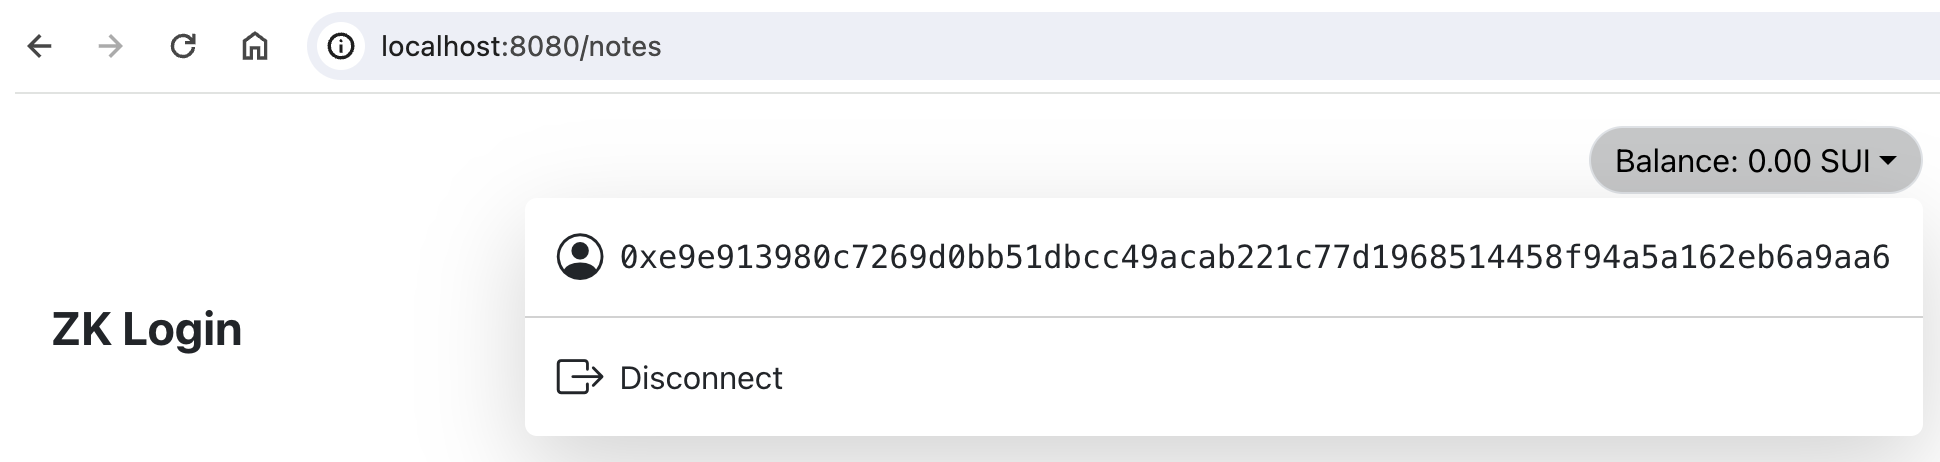
5.3 领水
- 点击右上角按钮,可以查看到我们通过zkLogin创建的用户地址,此时余额为0
- 为用户进行领水
$ export ALICE=0xe9e913980c7269d0bb51dbcc49acab221c77d1968514458f94a5a162eb6a9aa6

$ curl --location --request POST 'http://127.0.0.1:9123/gas' --header 'Content-Type: application/json' \
--data-raw "{
    \"FixedAmountRequest\": {
        \"recipient\": \"${ALICE}\"
    }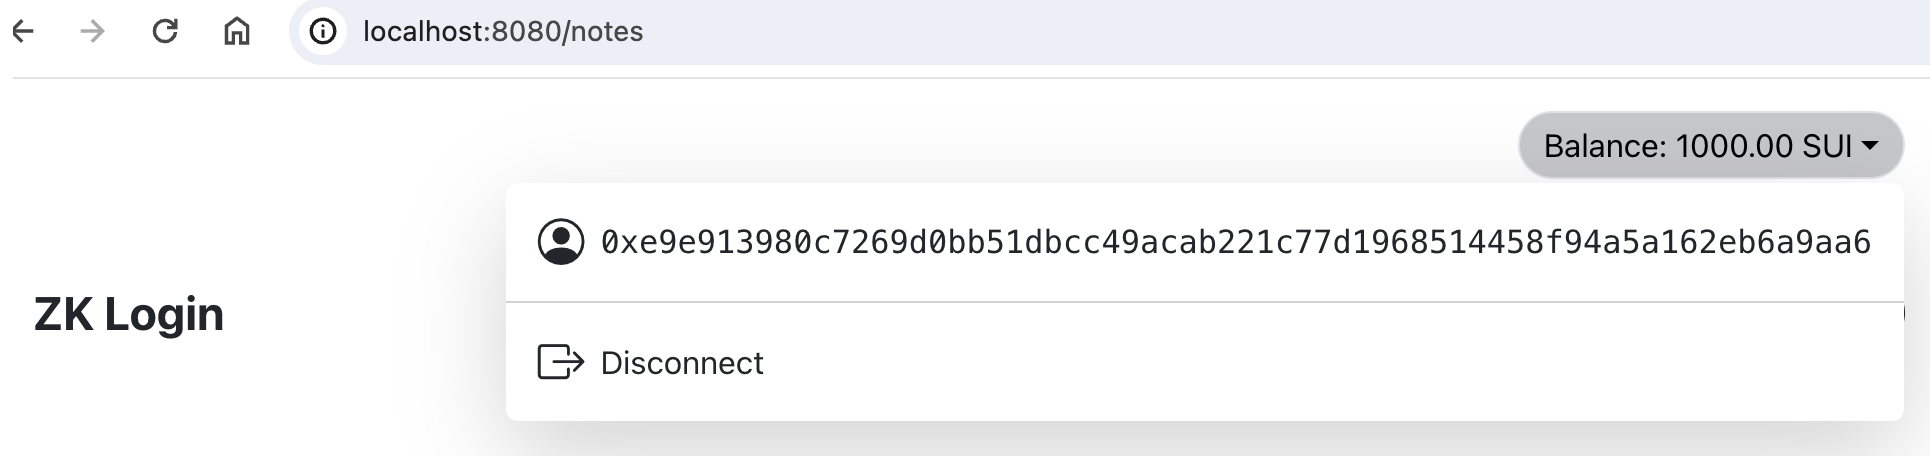
}"- 领水后可以看到余额发生变化
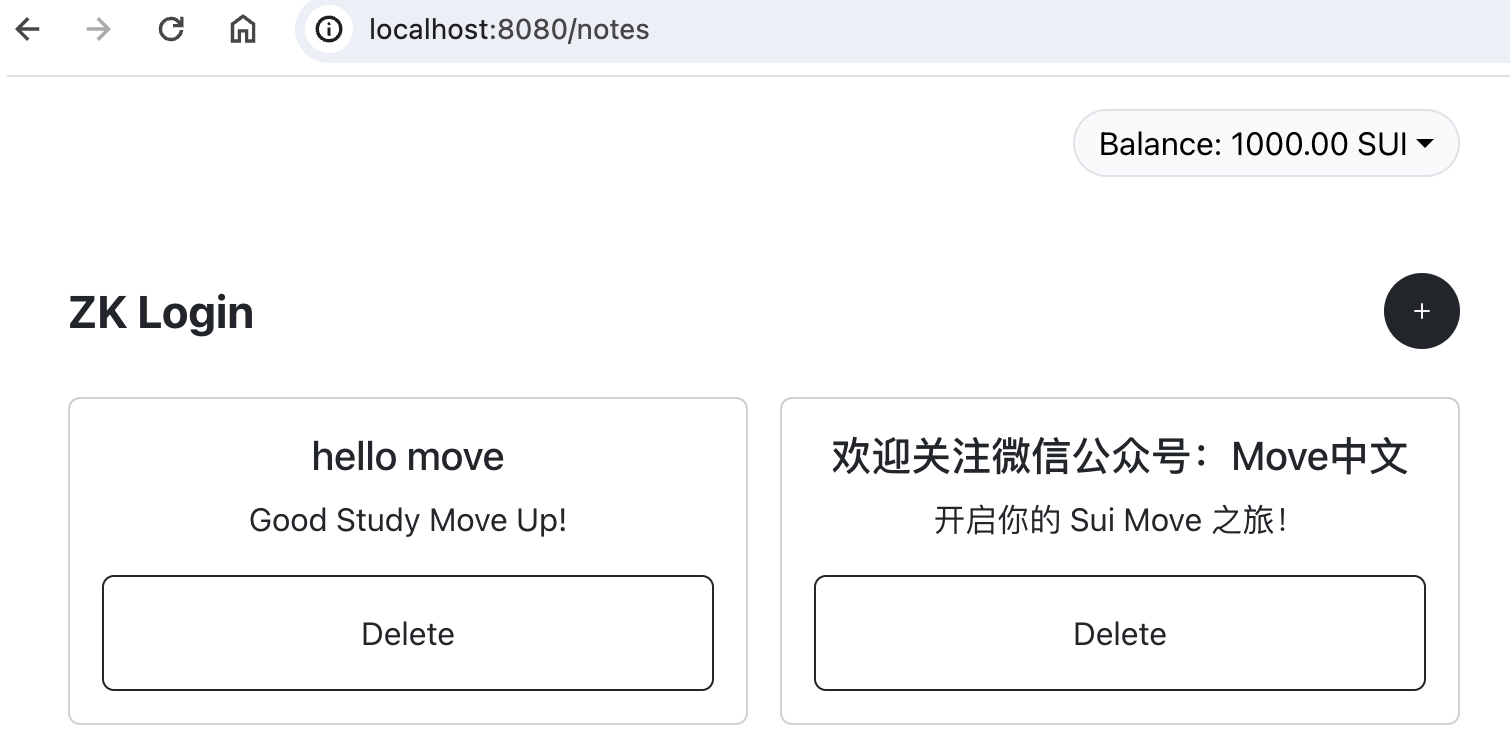
5.4 发布笔记
- 编写笔记
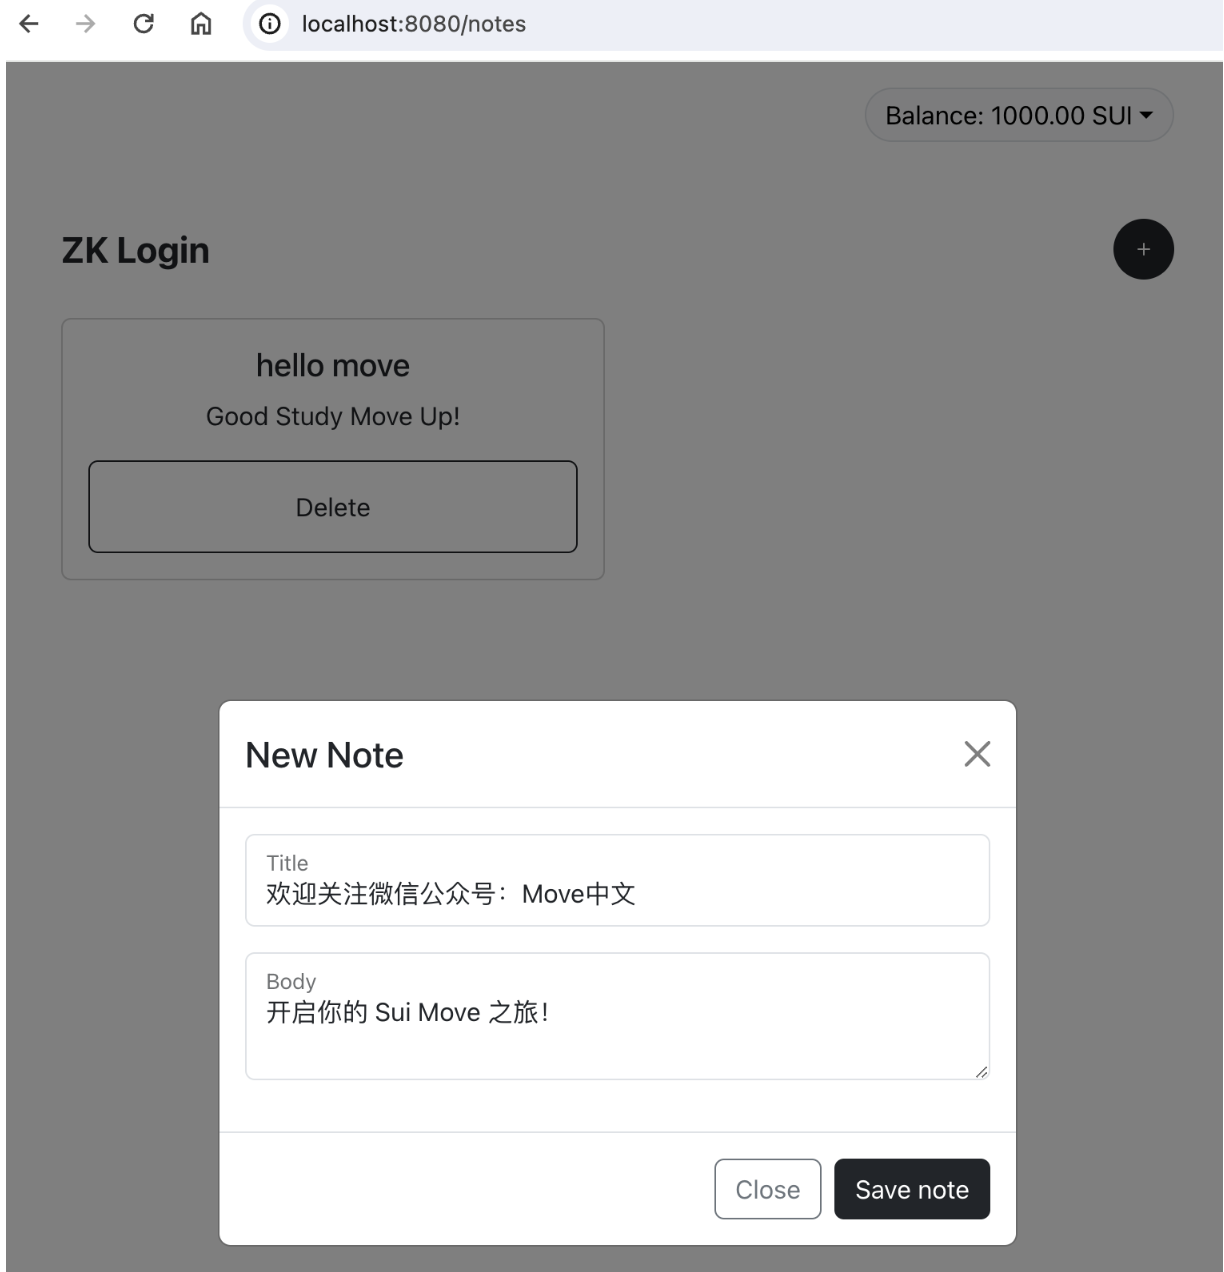
- 成功发布笔记
6 后记
至此,一个简单的基于zkLogin的SUI Move dApp就开发完了🎉
欢迎关注微信公众号:Move中文,开启你的 Sui Move 之旅!