如何通过 Hardhat 来验证智能合约
- Chainlink
- 发布于 2022-11-28 20:25
- 阅读 6289
本文介绍了如何使用最常用的智能合约开发框架之一——Hardhat 来完成以太坊智能合约的验证。
在很大程度上,由于部署到通用区块链的智能合约的不变性,安全始终是用户和企业的首要任务。因此,在以太坊上开发智能合约的关键步骤之一是初始部署后的 Etherscan 验证。Etherscan 使任何人,从用户到经验丰富的开发人员和 bug hunter,都可以检查代码的有效性、正确性和安全性。
在之前的文章中,我们学习了如何阅读 Etherscan 上的智能合约以及如何使用 Remix IDE 验证 Etherscan 上的智能合约。在本教程中,我们的目标是了解如何使用最常用的智能合约开发框架之一——Hardhat 来完成验证。
让我们开始吧。
创建一个 Hardhat 项目
让我们先创建一个新的 Hardhat 项目。首先,我们要检查我们机器上安装的 npm 版本。打开你的终端并输入:
npm -v如果你没有安装 npm,请按照这个指南进行操作。然后,输入以下命令安装 Hardhat:
npm install --save-dev hardhat如果你使用的是 yarn 而非 npm,请输入:
yarn add --dev hardhat如果你使用的是 Windows,强烈建议使用 WSL 2。
要创建示例项目,请在项目文件夹中运行以下命令,然后选择“创建 TypeScript 项目”:
npx hardhat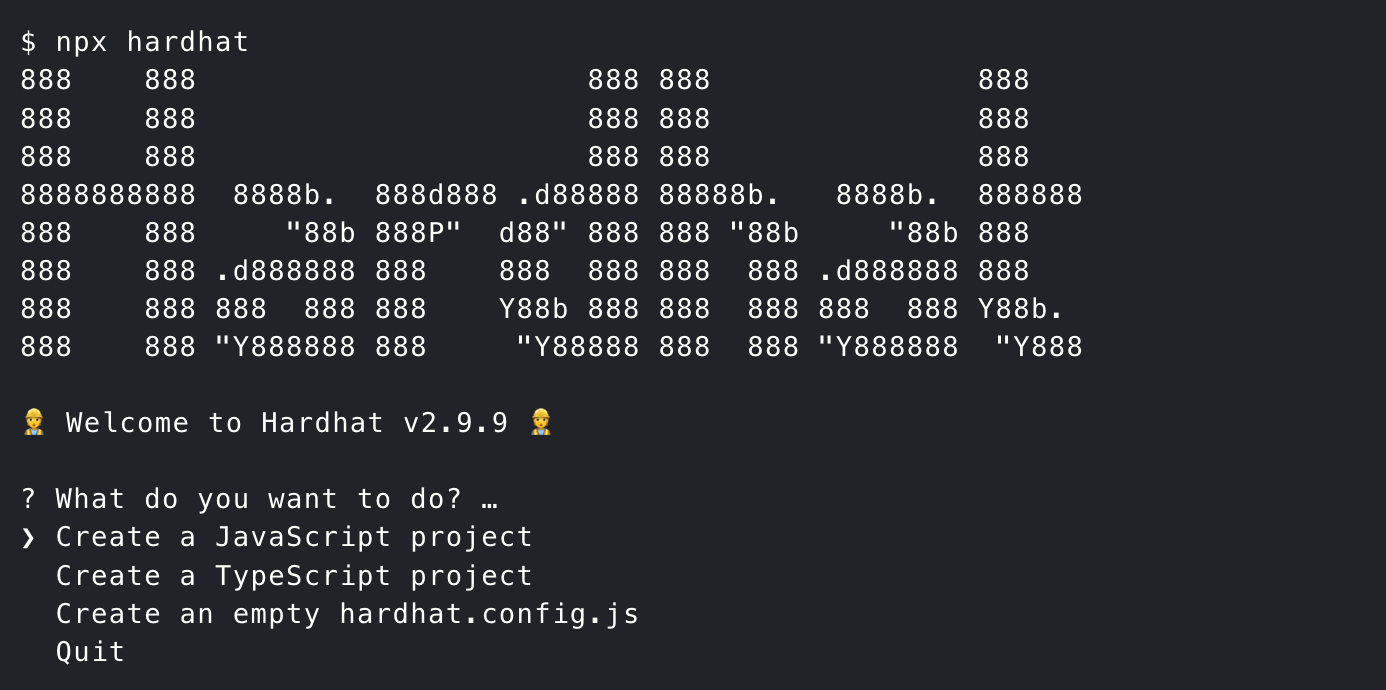
开发一个智能合约
如果前面的步骤工作正常,你现在应该能够看到三个主要的 Hardhat 文件夹:“contracts”、“test”和“scripts”。转到“contracts”文件夹,创建一个新的 Solidity 文件,并将其命名为“PriceFeedConsumer.sol”。然后,复制以下来自 Chainlink 官方文档的源代码。
// SPDX-License-Identifier: MIT
pragma solidity ^0.8.7;

import "@chainlink/contracts/src/v0.8/interfaces/AggregatorV3Interface.sol";

contract PriceConsumerV3 {

    AggregatorV3Interface internal priceFeed;

    /**
     * Network: Goerli
     * Aggregator: ETH/USD
     * Address: 0xD4a33860578De61DBAbDc8BFdb98FD742fA7028e
     */
    constructor(address priceFeedAddress) {
        priceFeed = AggregatorV3Interface(priceFeedAddress);
    }

    /**
     * Returns the latest price
     */
    function getLatestPrice() public view returns (int) {
        (
            /*uint80 roundID*/,
            int price,
            /*uint startedAt*/,
            /*uint timeStamp*/,
            /*uint80 answeredInRound*/
        ) = priceFeed.latestRoundData();
        return price;
    }
}
现在通过以下命令安装 @chainlink/contracts 依赖包:
npm install --save-dev @chainlink/contracts然后,通过运行以下命令编译合约
npx hardhat compile选项 1:在部署脚本中使用 hardhat-etherscan 插件验证你的合约
使用 Hardhat,你可以使用 hardhat-etherscan 插件在 Etherscan 上验证你的智能合约。
首先,你需要一个 Etherscan API 密钥。要获得一个,请访问 Etherscan 网站,免费创建一个新帐户并登录。之后,单击“API 密钥”选项卡。最后,单击“添加”按钮生成新的 API 密钥。
我们将把我们的智能合约部署到 Goerli 测试网络。如果你以前从未做过,你可能需要知道,为了从 Hardhat 部署智能合约,你必须提供私钥和 JSON RPC URL。你可以免费注册 Alchemy 以获得密钥。
你还需要一些测试用的 ETH,你可以从 Chainlink Faucet 轻松获得。
导航回你的 Hardhat 项目。修改“hardhat.config.ts”文件:
export default {
  // rest of the config
  networks: {
    hardhat: {},
    goerli: {
      url: `https://eth-goerli.alchemyapi.io/v2/${ALCHEMY_API_KEY}`,
      accounts: [GOERLI_PRIVATE_KEY],
    },
  },
  etherscan: {
    apiKey: "ABCDE12345ABCDE12345ABCDE123456789", // Your Etherscan API key
  },
};
在“scripts”文件夹中创建新文件,并将其命名为“deployPriceFeedConsumer.ts”。该脚本将部署 PriceFeedConsumer.sol 智能合约,出于安全原因,等待几个区块,并尝试在 Etherscan 上对其进行验证。
import { ethers, network, run } from "hardhat";

async function main() {
  const priceFeedAddress = “0xD4a33860578De61DBAbDc8BFdb98FD742fA7028e”;

  const priceFeedConsumerFactory = await ethers.getContractFactory(“PriceConsumerV3”);
  const priceFeedConsumer = await priceFeedConsumerFactory.deploy(priceFeedAddress);

  const WAIT_BLOCK_CONFIRMATIONS = 6;
  await priceFeedConsumer.deployTransaction.wait(WAIT_BLOCK_CONFIRMATIONS);

  console.log(`Contract deployed to ${priceFeedConsumer.address} on ${network.name}`);

  console.log(`Verifying contract on Etherscan...`);

  await run(`verify:verify`, {
    address: priceFeedConsumer.address,
    constructorArguments: [priceFeedAddress],
  });
}

main().catch((error) => {
  console.error(error);
  process.exitCode = 1;
});
保存文件并从终端运行下一个命令:
npx hardhat run scripts/deployPriceFeedConsumer.ts --network goerli你的合约现在应该部署到 Goerli 测试网并在 Etherscan 浏览器上进行验证。
选项 2:从你的 CLI 使用 hardhat-etherscan 插件验证合约
我们将再次使用 hardhat-etherscan 插件来验证我们的智能合约。
首先,前往 Etherscan 并注册一个帐户。在您的帐户设置下,找到“API 密钥”部分。使用免费计划生成一个 API 密钥。
我们将再次将我们的智能合约部署到 Goerli 测试网。如果你需要测试通证,请访问 Chainlink Faucet。
修改“hardhat.config.ts”文件
export default {
  // rest of the config
  networks: {
    hardhat: {},
    goerli: {
      url: `https://eth-goerli.alchemyapi.io/v2/${ALCHEMY_API_KEY}`,
      accounts: [GOERLI_PRIVATE_KEY],
    },
  },
  etherscan: {
    apiKey: "ABCDE12345ABCDE12345ABCDE123456789", // Your Etherscan API key
  },
};
在“scripts”文件夹中创建新文件,并将其命名为“deployPriceFeedConsumer.ts”。这将部署 PriceFeedConsumer.sol 智能合约并等待几个区块。
import { ethers, network } from "hardhat";

async function main() {
  const priceFeedAddress = “0xD4a33860578De61DBAbDc8BFdb98FD742fA7028e”;

  const priceFeedConsumerFactory = await ethers.getContractFactory(“PriceConsumerV3”);
  const priceFeedConsumer = await priceFeedConsumerFactory.deploy(priceFeedAddress);

  const WAIT_BLOCK_CONFIRMATIONS = 6;
  await priceFeedConsumer.deployTransaction.wait(WAIT_BLOCK_CONFIRMATIONS);

  console.log(`Contract deployed to ${priceFeedConsumer.address} on ${network.name}`);
}

main().catch((error) => {
  console.error(error);
  process.exitCode = 1;
});
使用以下命令部署你的智能合约:
npx hardhat run scripts/deployPriceFeedConsumer.ts --network goerli我们现在将使用 Hardhat 的“验证”任务从 CLI 在 Etherscan 上验证这个智能合约。此命令的一般语法如下所示:
npx hardhat verify --network <network> <contract address> <constructor parameters>我们将通过以下方式对其进行调整:
npx hardhat verify --network goerli <contract address>
0xD4a33860578De61DBAbDc8BFdb98FD742fA7028e
你应该能够在 Etherscan 上看到我们合约的公开验证源代码的链接。如果你收到一条错误消息说地址没有字节码,这可能意味着 Etherscan 还没有为你的合约建立索引。在这种情况下,请稍等片刻,然后重试。
选项 3:使用 hardhat flatten 任务验证你的合约
使用 Hardhat 进行 Etherscan 验证的第三个选项类似于通过 Remix IDE 进行的验证过程,这在我们之前的一篇文章中有所描述。
我们再次部署到 Goerli 测试网络,如果你需要测试通证,请导航至 Chainlink Faucet。为此,你不需要 Etherscan API 密钥。
你的“hardhat.config.ts”文件应如下所示:
export default {
  // rest of the config
  solidity: "0.8.9",
  networks: {
    hardhat: {},
    goerli: {
      url: `https://eth-goerli.alchemyapi.io/v2/${ALCHEMY_API_KEY}`,
      accounts: [GOERLI_PRIVATE_KEY],
    },
  }
};
我们将再次使用上一章的部署脚本:
import { ethers, network } from "hardhat";

async function main() {
  const priceFeedAddress = “0xD4a33860578De61DBAbDc8BFdb98FD742fA7028e”;

  const priceFeedConsumerFactory = await ethers.getContractFactory(“PriceConsumerV3”);
  const priceFeedConsumer = await priceFeedConsumerFactory.deploy(priceFeedAddress);

  const WAIT_BLOCK_CONFIRMATIONS = 6;
  await priceFeedConsumer.deployTransaction.wait(WAIT_BLOCK_CONFIRMATIONS);

  console.log(`Contract deployed to ${priceFeedConsumer.address} on ${network.name}`);
}

main().catch((error) => {
  console.error(error);
  process.exitCode = 1;
});
运行部署脚本:
npx hardhat run scripts/deployPriceFeedConsumer.ts --network goerli如果你在 Etherscan 上搜索你的合约地址,单击 Contract 选项卡时你只会看到合约的字节码。
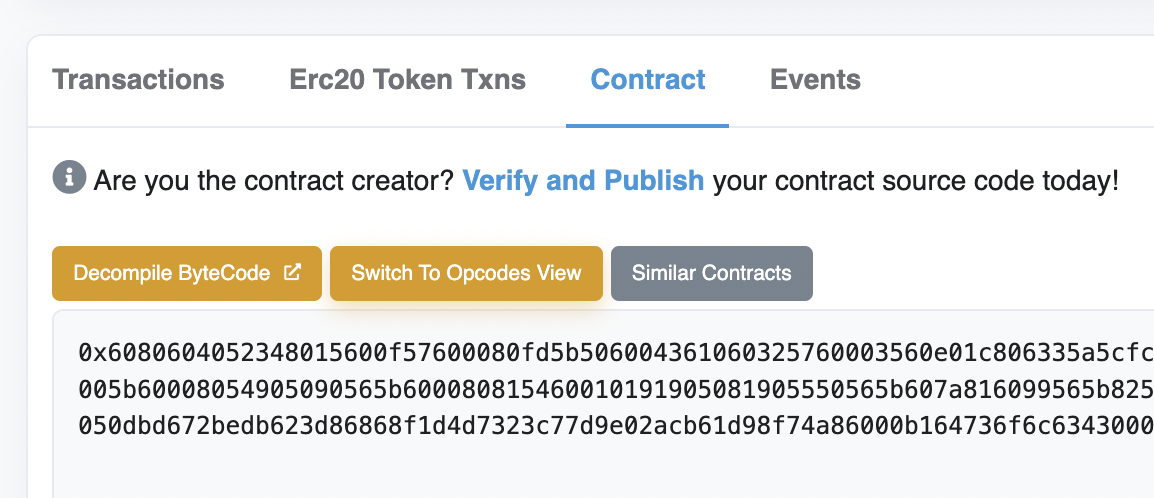
要开始验证过程,请单击“Verify and Publish”链接。将显示以下页面。
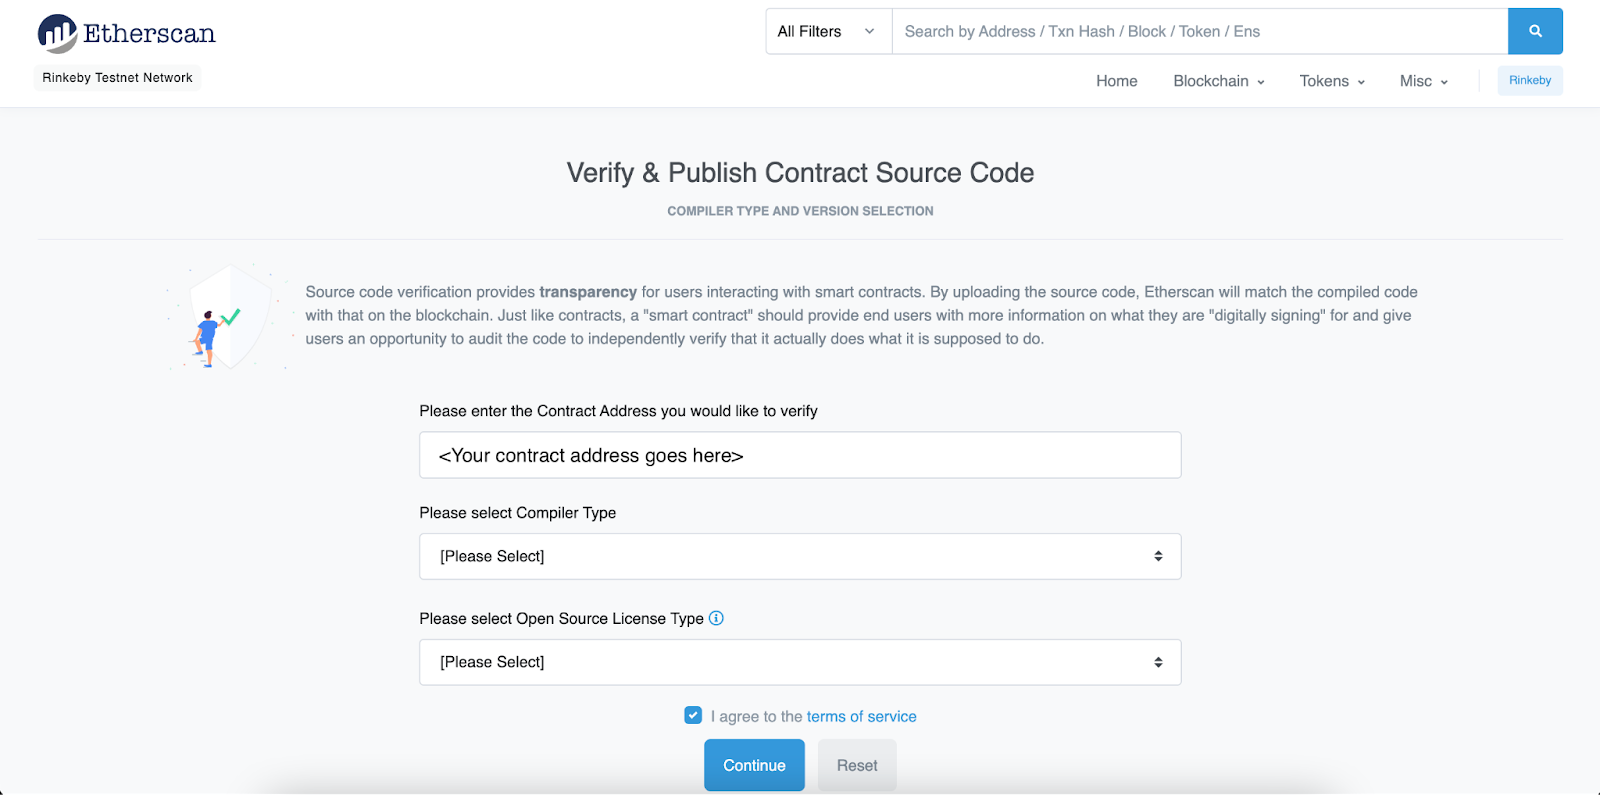
如果没有自动弹出,请在第一个输入字段中输入你的合约地址。
然后,从“Compiler Type”下拉列表中,选择“Solidity(单个文件)”。
之后,将显示“Compiler Version”下拉列表。在这里你需要选择你在部署之前用于编译这个智能合约的同一个 Solidity 编译器版本。如果你回顾一下“hardhat.config.ts”文件,你会发现在我们的例子中,编译器的版本是 0.8.9。
最后,从“Open Source License Type”下拉列表中,在 Solidity 文件开头选择 License 许可,指定为“SPDX-License-Identifier”,在本例中为 MIT。点击“继续”进入下一页。
在下一页上,你应该粘贴智能合约的源代码。不幸的是,如果你像我们一样导入了其他合约或接口,则不能只在此处复制粘贴。 Etherscan 还需要知道这些导入合约的源代码。为此,你需要通过键入以下命令来“flatten”你所有的智能合约:
npx hardhat flatten你的智能合约“flatten”版本将在终端中打印出来。或者,你可能希望将其保存在单独的文件中,你可以通过输入以下内容来完成:
npx hardhat flatten contracts/PriceFeedConsumer.sol > cotracts/PriceFeedConsumer_flat.sol现在你可以将合约的源代码粘贴到“Enter the Solidity Contract Code below”输入框中。然后,解决验证码并单击蓝色的“Verify and Publish”按钮。你应该能够在 Contract 选项卡上看到绿色复选标记。这意味着你已成功验证你的合约。
总结
在本文中,我们介绍了如何使用三种不同的方法从 Hardhat 验证 Etherscan 上的智能合约。智能合约验证是部署过程中的关键步骤之一,因为它允许社区在使用之前检查源代码。
欢迎关注 Chainlink 预言机并且私信加入开发者社区,有大量关于智能合约的学习资料以及关于区块链的话题!


